SQ08—SQ40 2015 Dryer — Owner/Operator Manual

Check all moving and rotating parts for vibration, wear or damage, and lubricate as needed.
- Inspect the Auger flighting.
- Check the Fan and Motor assembly for blade damage, or a shift in wheel clearance.
- Check for loose balance-weight Bolts—indicated by a “clicking” sound when a Fan is rotated slowly.
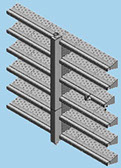
- Check Auger bearings for wear. Listen for clatter or vibrations with the Dryer running empty. If excessive noise or vibration is present, trace the sound/source of the vibration to either hanger bearings or end bearings. Top Auger hanger bearings can be inspected by removing the Garner Bin Access Panel on top of the Garner Bin beside the bearing hanger. Bearing locations have two (2) formed galvanized angles sandwiching the upper slope flanges of the Garner Bin skin panels.
- Check the Grain Level Switch paddle for free rotation.
- Check the Motor rotation on three-phase models—if power wires have been dis- connected since their last use.
- Grease the Fan Motor as per instructions in the Lubrication Chart . Some Motors have an additional CAUTION Decal 001948 (not shown) with special lubrication notes.
Check the tightness of screws on major Control Panel components (starters, relays, circuit breakers, etc.) Loose electrical connections can cause overheating and erratic operation.
Check the Plumbing Train through the Burner and Vaporizer:
- Clean the gas line strainer only if fuel restriction or starvation is indicated by high upstream pressure with lower-than-normal downstream pressure on the liquid pressure Gauge (LP gas). Use pipe joint compound when replacing plug threads. If a new inlet line has been installed, or the Dryer has been moved to a new location, check for pressure drop across the strainer after the first day of operation.

x
- Clean the Burner Igniter and re-gap it to 3/16'' [4.8] if necessary.
- Check the Burner. Clean plugged orifices with a drill bit—50# drill, .070'' [1.8] or an acetylene torch tip cleaner. Check the tightness of bolts and nuts attaching perforated baffles to the Burner. Replace as required.
- Using a liquid soap solution, check for plumbing leaks.
Check Thermostat capillaries to make sure they are properly retained and positioned.
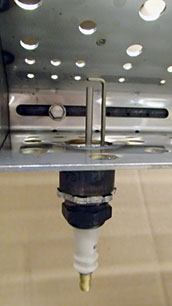
Burner Igniter
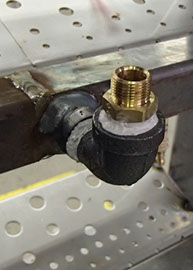
Burner, Pilot Fitting
Copyright © 2014-2016 CTB, Inc. All rights reserved BLV0915